...
| Warning |
|---|
| title | Overdue orders come first |
|---|
|
If your company has overdue orders — confirmations past their scheduled delivery date — the Order Manager opens on the Overdue tab and won't let you switch tabs until those are dealt with. The block is company-wide, so a colleague's overdue orders hold you back too. Clear it by opening each overdue order and updating its confirmation. |
Step 1: Open and check the order
| Section |
|---|
| Column |
|---|
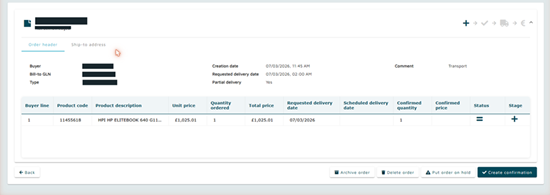
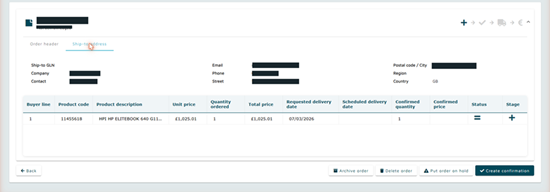
| Click any row to open the order. The status sits under the order number (for example Not acknowledged), with the Stage track top-right and the next-action buttons along the bottom. The Order header holds the order-level facts: buyer and bill-to GLN, order type, creation and requested delivery dates, whether partial delivery is allowed, and any comment. Each order line shows the product, unit and total price, quantity ordered and requested delivery date — and gains a scheduled date, confirmed quantity and confirmed price once you confirm. Ship-to addressThe Ship-to address tab shows where the goods go — GLN, company, contact, address and country. Check this before you despatch. |
| Column |
|---|
| 
|
|
Step 2: Confirm the order
| Section |
|---|
| Column |
|---|
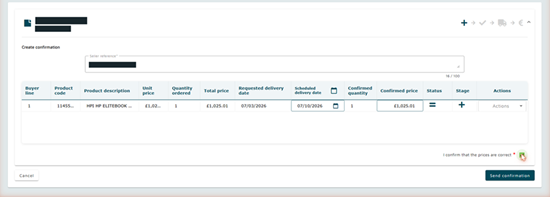
| Confirming tells your buyer you accept the order and on what terms. It sends an order response and moves the order to Confirmed. - Open the order and click Create confirmation.
- Enter a Seller reference — your own order number for this sale.
- Set the Scheduled delivery date for the line.
- To set the same date for the whole order at once, use the calendar icon in the Scheduled delivery date column on the header row — it applies to every line.
- Adjust the Confirmed price if it differs from what was ordered.
- To adjust the Confirmed quantity, use the Actions drop-down to split the line. Note: the order quantity must equal the ordered quantity.
- Tick I confirm that the prices are correct.
- Click Send confirmation — a "1 order processed successfully" message appears.
|
| Column |
|---|
| 
|
|
...
| Panel |
|---|
| title | Confirmed vs. confirmed with changes |
|---|
|
If the values you send back match the order, its status becomes Confirmed. If anything differs — a changed price, a split line, or a delivery date later than requested — it becomes Confirmed with changes, and your buyer sees exactly what you altered. |
Step 3: Create a shipment
Creating a shipment tells your buyer the goods are on their way. It sends a despatch advice and moves the order to Fully shipped.
...
| Warning |
|---|
| title | The confirm step is final |
|---|
|
The dialog reminds you to check the lines and quantities and warns that a shipment cannot be changed once confirmed. It also flags if you're shipping without track & trace keys. If quantities are wrong, use Split line before confirming. |
Step 4: Create the invoice
| Section |
|---|
| Column |
|---|
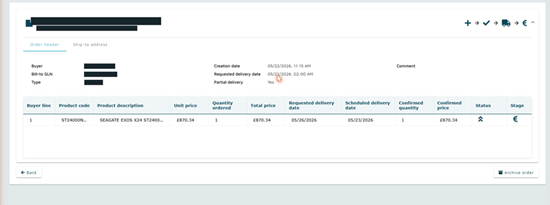
| The final stage bills your buyer. Once an order is shipped, a Create invoice action becomes available; completing it sends the invoice and moves the Stage track to its last node. The order then appears under Completed as Fully invoiced. |
| Column |
|---|
| 
|
|
...